![iam small logo.png]](https://support.iamcompliant.com/hs-fs/hubfs/iam%20small%20logo.png?height=50&name=iam%20small%20logo.png)
Pathways can be created quickly and tailored to your organisation’s needs.
Each pathway can be named to suit its purpose and assigned to specific locations or made available account-wide. Once a pathways is created, steps such as documents, text instructions, or courses from our training library can be added, reordered, or removed at any time, allowing your pathways to evolve as training requirements change.
1. Navigate to "Manage Pathways" from the Training menu

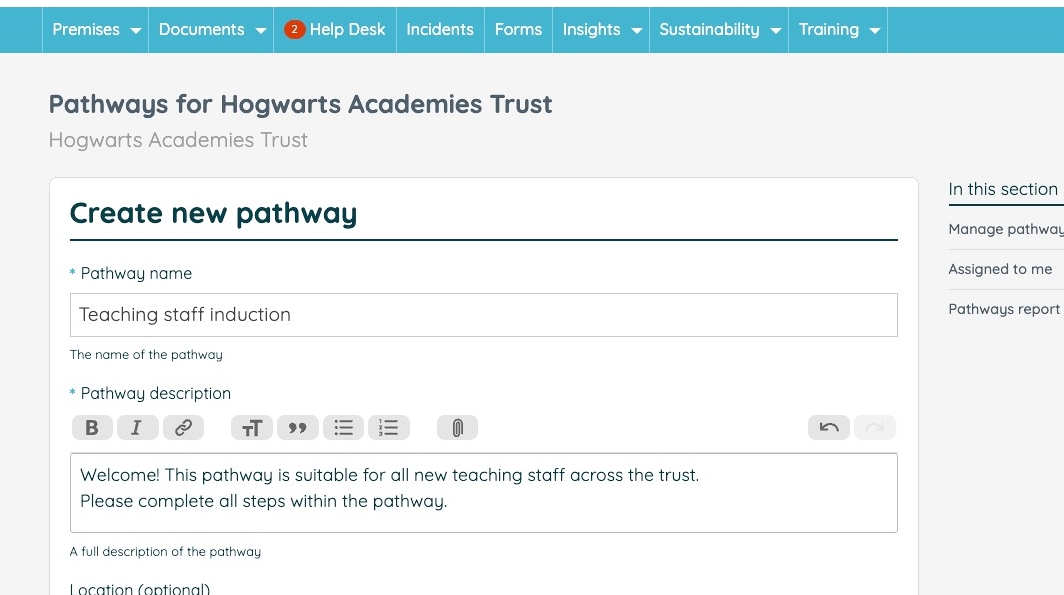
2. Click "Create new pathway"

3. Give your pathway a title and description which helps explain the what the pathway is and who it is for.
4. Next, you can choose which location the pathway will be available for.
If you'd like to have the pathway be available across your whole organisation then this can be achieved by not selecting a specific location.

5. Select an owner for the pathway. You, as the pathway creator, will be the default option, but you will be able to select from any other user with 'admin' access to Pathways for your chosen location. If your pathways applies to all locations, then the owner will also need to be someone who can access all locations within your account.

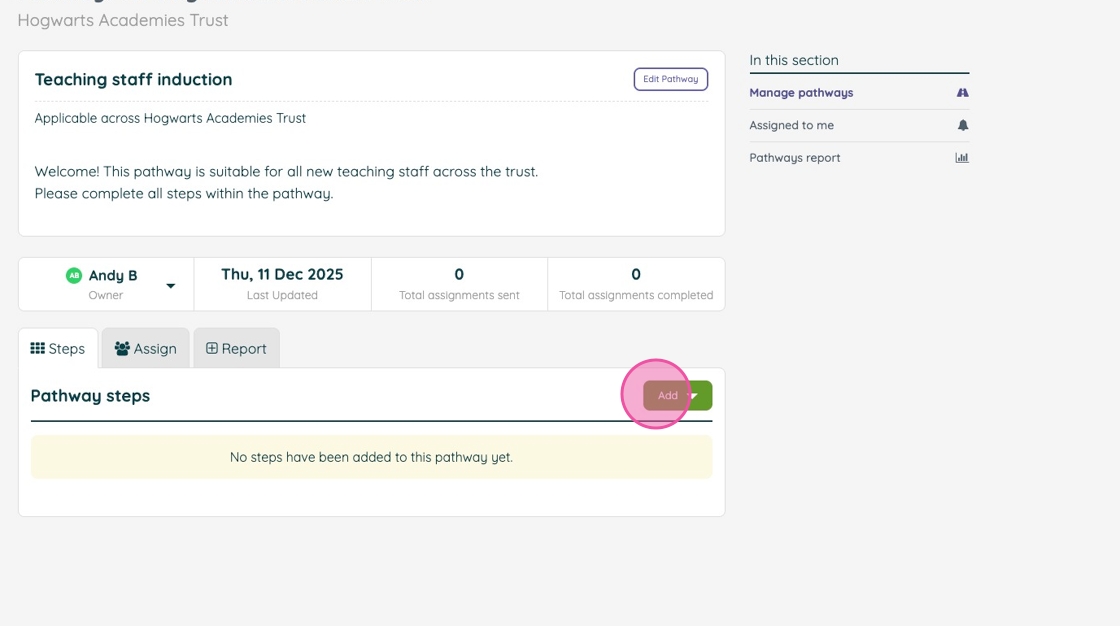
6. Click "Create Pathway" to save your progress.

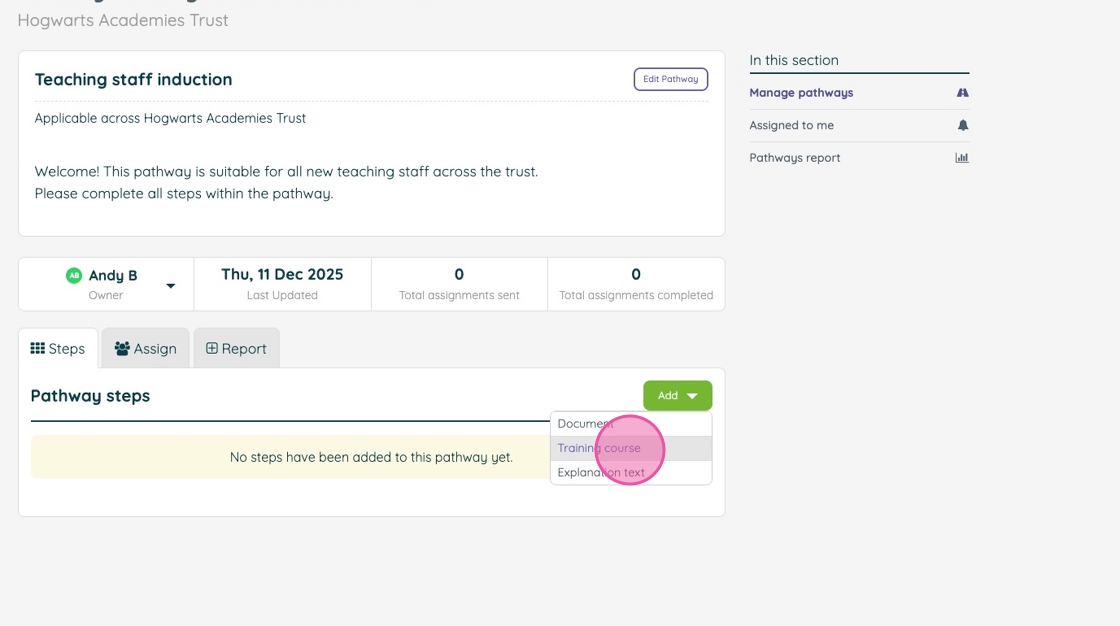
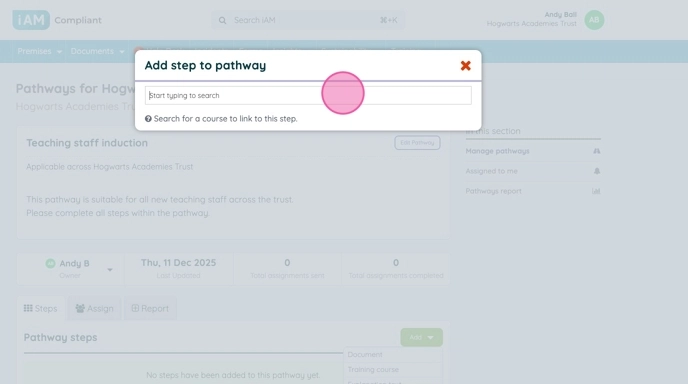
7. Next, you'll want to add some steps to your pathway. Click the "Add" button to choose a step type.
8. Click "Training course" to choose a course from the iAM library.
9. A modal will open where you can search courses by name and collection. When you find a course you'd like to add, simply click "Add to pathway". You can do this for as many courses as you'd like to add. You can also remove a course by clicking the red bin icon.
When you've made your selections, close the modal by clicking the red x in the corner.
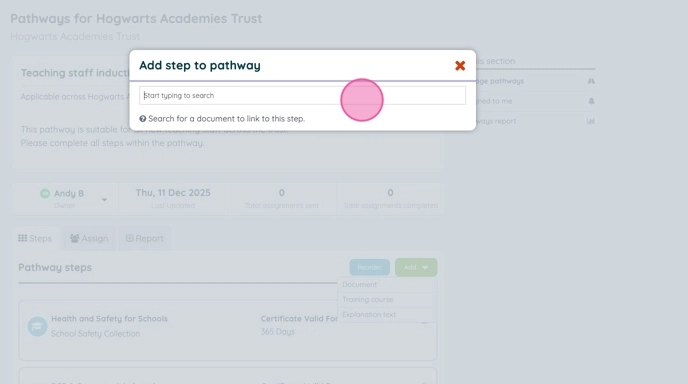
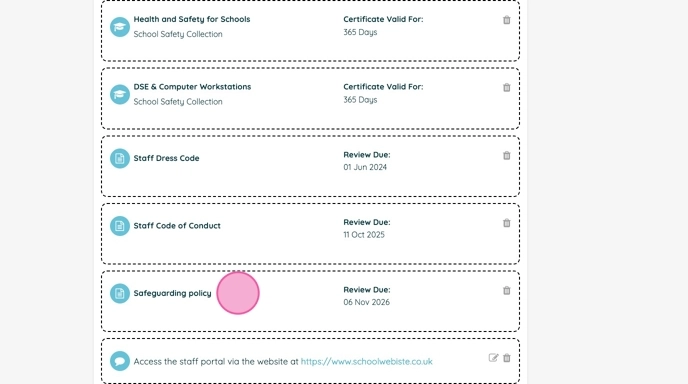
10. Click "Document" to add a document step. You can choose to add any document that you can access from your iAM Policies & Procedures area or Health & Safety Risk Assessment area.

11. A modal will open where you can search for documents by name. When you find a document you'd like to add, simply click "Add to pathway". You can do this for as many documents as you'd like to add. You can also remove a document by clicking the red bin icon.
When you've made your selections, close the modal by clicking the red x in the corner.
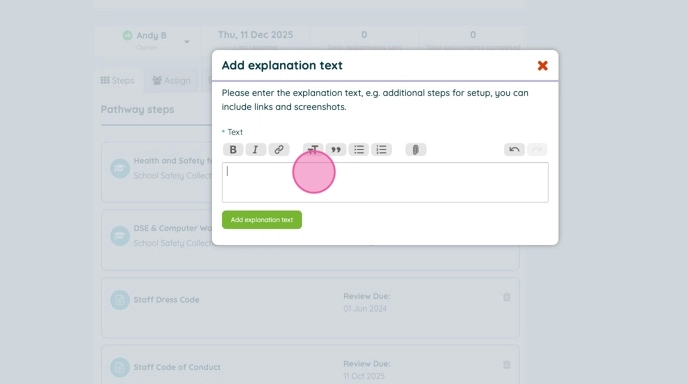
12. Click "Explanation text" to be able to add a step for users to be able to complete content that is outside of iAM's training or documentation areas.

13. Your step could be as simple as a couple of lines of text, but you can also embellish this with links, images, or other attachments. Click "Add explanation text" to add your step when you've finished.
You can add as many of these steps as you like, but they must be added individually.
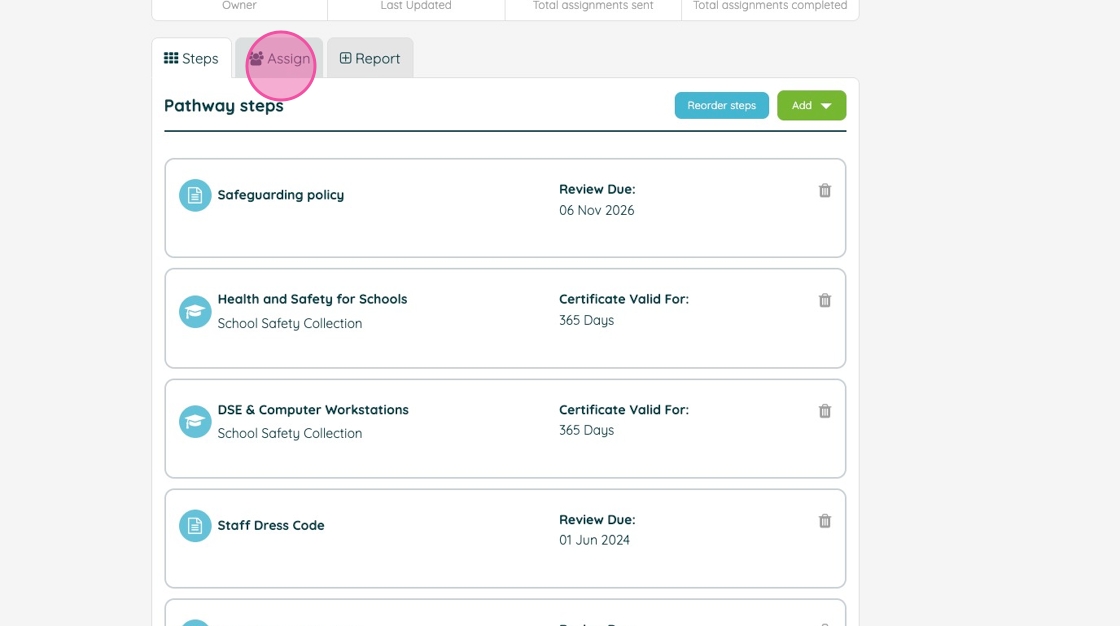
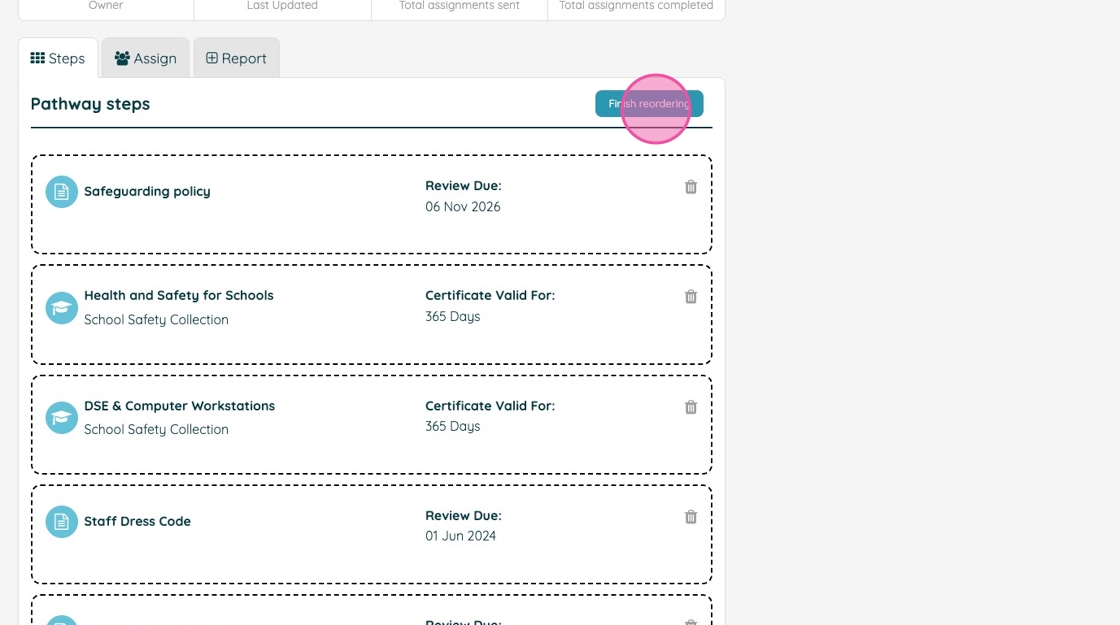
14. Once you've added all the steps your pathway needs, you may wish to adjust the ordering of the steps. You can do this by clicking the "Reorder" button.
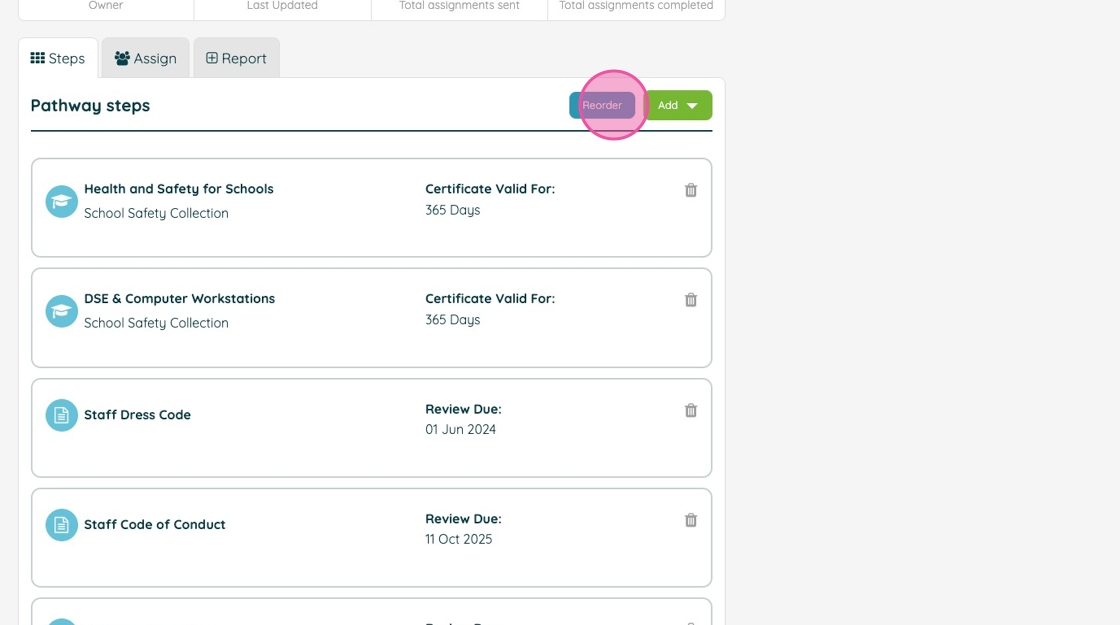
15. Now you can click and drag any steps to suit your preferred order.
16. Click "Finish reordering" to save your new order.
17. Once you're satisfied with the steps and their order, you are ready to start assigning users. This can be done from the "Assign" tab.